Menu
Showing posts with label HEALTHY. Show all posts


Dry fruit Savarisi payasam/Dry fruit sago kheer is a delicious and healthy dessert recipe. In South India, payasam is one of the best ending dishes in every meal during festive and ceremonial. Its a rule too..whenever planning food menu for ceremonials, payasam is the mandatory dessert recipe to be served for guests. Different delicious payasam recipes are there, check this link for Paal payasam/Milk kheer This dry fruit payasam is even more delicious to have and this recipe satisfies the Dry fruit lover's taste buds. It is the best competitor for all payasam recipes. 

To be honest, I make this recipe suddenly, my mom was planning to make Paal payasam for Friday meal, I entered the kitchen stopped her work, make this recipe in all of sudden. This recipe is taking me back to my hometown's childhood days. During my weekend, my dad(I like to mention his name here - Govindaraju Veeranan) takes me with him for an outing, he asks me what u want to have, every time I replied the same dad! I want Manjal payasam.. haha.. Yes, payasam is yellow in color. I named it as Manjal/yellow payasam. actually, that is badam milk payasam. Even After my marriage, my dad bought me the same payasam every time, I visit my home on vacation. Now its Covid19 lockdown, during our everyday meal, he says to me the shop is not opened for getting payasam. I make the same yellow payasam at home, I am very conscious in the color of the payasam haha.. finally I make this dry fruit sago payasam with the same taste and served my dad !!!! I am very happy by seeing my dad's happy face while having payasam. Its a healthy and friendly recipe for all ages.

Come!! I will share how to make Dry fruit sago payasam/Dry fruit sago kheer recipe in simple and quickly. Try this in your kitchen. I hope you all Love it

                 Learning and Sharing is real Happiness!!!!!!    


Course: Dessert  Prep Time: 5 minutes  Serving: 6
 Cuisine: Indian Cook Time: 20 minutes    Author: Bhuvana Devi

    Ingredients:

  • Ghee -1 tbsp
  • Sago-1/4cup
  • Milk 2 cups
  • Water 1.5 cups
  • Cardamom powder - 1/4tsp
  • Saffron- 10 strands
  • Sugar- ¼ cup

  • Cashews- 10
  • Raisins-10
  • Almond -6
  • Pistachio– 6
  • Walnuts- 3
  • Condensed milk - 2 tbsp

 Preparation

  • Heat a pan, add 1 tbsp of ghee, roast the cashews, raisins, Keep it aside.
  • With the same pan roast sago for 3 min, keep aside. Boil the roasted sago with 3 cups of water until it turns glossy. drain the water and keep it aside.
  • Take the blender, add the almonds, pistachios, blend it into a fine powder.
  • For removing the skin of the almonds instantly, soak it in the hot water for 3 min, and remove the skin easily.
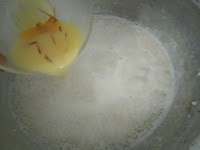
  • Soak the saffron strands with 2 tbsp of warm milk for 10 min and keep it aside 

 Method:

  •    Take a pan, add 2 cups of milk and 1.5 cups water, bring it to boil.
  •   Once the milk gets boiled, add the boiled sago, grounded dry fruit powder,      mix and cook well for 5 min.
  •         Add the condensed milk, sugar,  mix, and cook for a few mins.
  •         Now, add the saffron milk and mix it well.
  •       Add Cardamom powder and roasted cashews, raisins. 

            Serve the yummy delicious dry fruit Payasam with hot or cold !!!!

Pictorial step by step Method:

Step 1:Heat a pan, add 1 tbsp of ghee, roast the chopped cashews, walnuts, raisins, Keep it aside.

Step 2:With the same pan roast sago for 3 min, keep aside. Boil the roasted sago with 3 cups of water until the sago turns glossy. drain the water and keep it aside.

Step 3:Take the blender, add the almonds, pistachios blend it into a fine powder.  (For removing the skin of the almonds instantly, soak it in the hot water for 3 min, and remove the skin easily.)                                                     

Step4: Soak the saffron strands with 2 tbsp of warm milk for 10 mins and keep it aside   
Step5: Take a pan, add 2 cups of milk and 1.5 cups water, bring it to boil.

Step 6:Once the milk gets boiled, add the boiled sago, grounded dry fruit powder,    and mix and cook well for 5 min.

Step 7: Add the Grounded badam pistachio powder, condensed milk, sugar, and mix well.


Step 9:Now, add the saffron milk and mix it well.


Step 10: Add cardamom powder and roasted cashews, raisins. 
  

   Serve the yummy delicious dry fruit Payasam with hot or cold !!!!

             Try it in your kitchen!  If u like this recipe, do share it with your friends and family. Tried this recipe?? Tag me @myclickandtick and #myclickandtick on Instagram. 


2

Frying all the masalas before cooking is biriyani. Biriyani is the tempting dish. It’s a favorite dish for all age factors. Why can’t we make it with ingredients?. This Vaazhaipoo/Banana Blossom Biriyani is a delicious and healthy one to have. Banana blossom/Vaazhaipoo is a boon to all women, there are more benefits of Vaazhaipoo - It is the best home remedy for PCOS, excessive bleeding, treats all uterus problems, and keeps healthy. It is good to have during pregnancy time to prevent constipation and it helps to increase the breast milk supply for lactating mothers. check with the link for more Vazhaipoo recipes => Vazzhaipoo/Banana blossom poriyal , Vazhaipoo /banana blossom kola. Even though Banana blossom has starchy taste, you can make it tastier by this recipe.  Here, I will explain to you how to make Banana Blossom Biriyani which is more famous in the Indian state of Tamil Nadu.


Come!! I will share with you all the step by step procedure and pictorial method of making Vaazhaipoo/Banana Blossom biriyani that makes your kitchen smell with the aroma of biriyani the whole day.

                   Learning and Sharing is real Happiness!!!!!!

                          This kitchen is seasoned with Love

Course: Veg –Main course

 Prep Time:25minutes

Cook Time:40 minutes

 Cuisine: Indian

 Serving: 3 

 Author: Bhuvana Devi

                                            Note: * 1 cup = 235 ml

    Ingredients:

  •      Seeraga samba rice -1.5 cups (water ratio (1: 2))
  •      Banana Blossom –1 cups
  •      Coconut oil  -2 tbsp
  •      Ghee- 1 tbsp
  •      Ginger Garlic paste-2 tbsp
  •      Green Chilly -2
  •      Tomato -1  (Small size)
  •      Big onion- 1 (Medium sized)
  •      Curd- 1 tbsp
  •      Half Lemon Juice
  •    Chili powder- 1tsp
  •      Turmeric powder- 1/2tsp
  •      Biriyani Powder-  2 tbsp
  •      Coconut pieces – 5 (2 inches)
  •      Bay leaf -2
  •      Cinnamon- 2( 2 inches)
  •      Cloves-3
  •      Cardamom-4
  •      Star Anise -1
  •      Coriander leaves  &mint leaves -  ¼ cup each
  •      Salt- req 
Check this link for making Different Biriyani recipes=> Vegetable- Bread biryani, Mushroom Biriyani, Dindigul Thalapakatti Chicken Biriyani.

PREPARATION:

  • Cleaning Vaazhaipoo/Banana Blossom:   TakeVaazhaipoo/Banana Blossom, open the feathery petals which is not edible,  you find the florets , inside the flower, you can see the match stick like stem and transparent papery petal i.e.; calyx & pistil remove  this two as it tastes bitter, chop & soaks it in the buttermilk to avoid discoloring.
  •   Masala paste:  Take a blender, add, coconut pieces, mint & coriander leaves, Fennel seeds, add little water and blend it into a smooth paste and keep it aside.
  •   Chop the onions, tomato finely, Slit green chilies.
  •  Wash and soak rice in water for 20 minutes. Then drain the water and keep the rice aside.

INSTRUCTIONS

1.   Take pressure to heat oil & ghee, once it gets heated, add cloves, Cinnamon stick and cardamom cumin seeds, bay leaf. Sauté it.

2.   Add chopped onion and green chili. Sauté well

3.   Add ginger-garlic paste. Sauté well until the raw smell goes away.

4.   Add the coconut, mint coriander paste and sauté well.

5. Then, add chopped tomato, salt, turmeric powder and chili powder, Biriyani powder. Saute well for a few mins.

6.   Now add the cleaned banana blossom/ Vazhaipoo and mix and sauté well until raw smell goes away.

7.   Add the ½ tbsp curd and mix well.

8.  Add 3 cups water, ½ lemon juice. Mix well. Allow the mixture to boil well. Add half lemon juice. After the mixture boils well and foam forms, add soaked rice, mix well, and check for salt.

9.   Close the pressure cooker with lid and cook it for 4 whistles in medium flame.

10. Once the pressure is gone, do not disturb it for  10 more minutes. And open the cooker, fluff it gently using a spoon.

                 Serve the delicious Vaazhaipoo Biriyani with onion raitha.

Step by step Pictorial method:

Step1: TakeVaazhaipoo/Banana Blossom, open the feathery petal which is not edible, you find the florets, inside the flower, you can see the match stick like stem and transparent papery petal i.e.; calyx & pistil remove this two as it tastes bitter, chop & soaks it in the buttermilk to avoid discoloring.


Step2: Take a blender, add, coconut pieces, mint & coriander leaves, Fennel seeds, add little water and blend it into a smooth paste and keep it aside.


Step3: Wash and soak rice in water for 20 minutes. Then drain the water and keep the rice aside.

Step4: Take pressure to heat oil & ghee, once it gets heated, add cloves, Cinnamon stick and cardamom cumin seeds, bay leaf. Sauté it.
Step5:  Add chopped onion and green chili. Sauté well.
Step6: Add ginger-garlic paste. Sauté well until the raw smell goes away.

Step7: Add the coconut, mint coriander paste and sauté well. 


Step8: Then, add salt, turmeric powder, chili powder, Biriyani powder.  chopped tomato Saute well for a few mins.
 

Step9: Now add the cleaned banana blossom/ Vazhaipoo and mix and sauté well until raw smell goes away.


Step10: Add the ½ tbsp curd and mix well.


Step11:  Add 3 cups water, ½ lemon juice. Mix well. Allow the mixture to boil well.  After the mixture boils well and foam forms, add soaked rice, mix well, and check for salt.


Step12: Close the pressure cooker with lid and cook it for 4 whistles in medium flame.

Step13: Once the pressure is gone, do not disturb it for  10 more minutes. And open the cooker, fluff it gently using a spoon.


Step14: Serve the delicious Vaazhaipoo Biriyani with onion raitha.


Serve the tasty Mushroom gravy along with, Vazhaipoo /banana blossom kolaonion raita to stimulate your taste buds. 


           Try it in your kitchen!  If u like this recipe, do share it with your friends and family. Tried this recipe?? Tag me @myclickandtick and #myclickandtick on Instagram. 


4

Fish lollypop

     Crispy Fish lollipop is boneless fritters, inner soft outer crispy recipe. Weekends are blessed with nonveg recipes almost in all homes. Last week chicken or mutton then this week must be fish, this is the rule. Haha!!!  This recipe takes me back to my childhood memories when I am not a fan of fish and I was enjoying my mutton kola or Vazhaipoo kola in a corner of the table.  

         My brother Suren & sis Durga loves to have a fish fry. My sis is very peculiar in having foods; she loves fish fry not curry, that is another department for my mom to cook different recipes for each. Coming back to fish … they suffer a lot for splitting the flesh and bones from fish fry. My mom lost her patience in splitting bones and flesh. I was noticing all the atrocities of my bro and sis in the fish meal day. So my mom makes this recipe for them and keeps herself free from the splitting work. They love and enjoyed having fish lollypop a lot. They just bite like a chicken lollypop and enjoy the fish taste.


Making fish recipes, serving, and feeding the kids without bone is additional work than fish cooking. This recipe reduces your fishbone removing work. Kids love to have this fish lollipop, it would be easy for them to consume without bones. It is a perfect appetizer for fish lovers.      

                            Learning and sharing is real happiness!

Come I will share with you how to make crispy lollypop with step by step pictorial method in an easy and simple way.

Cuisine: Indian

Course: Non-veg Starters

Preparation time: 25 min

Cooking time: 15 min

Resting time: 30 min

Author: Bhuvana Devi

 Ingredients:

·        Cleaned Fish- 3 pieces

·        Cinnamon (2 inches) – 1

·        Cloves- 2

·        Dried Redchilli-1

·        Bay leaves- 1

·        Fennel seeds-1/2tsp

·        Garam masala-1tbsp

·        Chili powder-1/2tsp

·        Turmeric powder-1tsp

·        Ginger garlic paste- 1 tsp

·        Besan flour- 1 tbsp

·        Potato  – 1

·        Curry leaves, coriander leaves (few)

·        Corn flour -1 tbsp

·        Bread crumbs - 1/2 cup

·        Oil to deep fry

·        Salt- req.

 Instructions: 

  • Take a pan to boil the 1 cup of water, the cleaned fish along with salt and a pinch of turmeric powder, Cinnamon, cloves, bay leaves, dried red chili and cook well for 10 min. turn off the flame.
  • Let it cool, strain the water, and separate the flesh and bones from the fish.
  • Take a separate pan, add skin peeled potato with a cup of water, cook it well for 15 min, strain the water, mash it and keep it aside. (Instead of potato you can also add moong dal )
  • Take a blender, add the cooked fish, Garam Masala, turmeric powder, chili powder, salt to taste, ginger garlic paste, fennel seeds, besan flour, mashed potato, Curry leaves, coriander leaves blend it well into a smooth paste.
  • Take a grounded paste in a mixing bowl. Divide it into equal portions, make a small ball place it in the mold for shaping lollypops, insert the wooden stick in the center, and keep it aside. ( I used 1/4  measuring cup for molding the lollipops).
  • Take a small bowl to add 1tbsp of cornflour with 3 tbsp of water mix and make it into watery consistency.
  • Dip the fish lollypops into the cornflour mix &roll it on the bread crumbs and keep it in the refrigerator for 30 min.
  • Heat a pan with enough oil for deep frying. Once the oil is hot add the fish lollypop and deep fry until it turns golden brown color. (cook in a medium flame.)

                Now the yummy crispy kid's favorite fish lollypops are ready to serve

   Pictorial method :

      Step 1:Take a pan to boil the 1 cup of water, the cleaned fish along with salt and a pinch of turmeric powder, Cinnamon, cloves, bay leaves, dried red chili.


        Step 2: Cover it with lid. cook for 10 min.


        Step 3: Strain the water, and separate the flesh and bones from the fish.


     Step 4: Take a separate pan, add skin peeled potato with a cup of water, cook it well for 15 min, strain the water, and mash it keep it aside. 
(Instead of potato you can also add moong dal )

Step 5: Take a blender, add the cooked fish,  Garam Masala, turmeric powder, chili powder, salt to taste, ginger garlic paste, fennel seeds, besan flour, mashed potato, Curry leaves, coriander leaves blend it well into a smooth paste.
 
Step 6: Take a grounded paste in a mixing bowl. Divide it into equal portions, roll, and make a small. 
 
Step 7: Place it in the mold for shaping lollipops, insert the wooden stick in the center of fish balls, and keep it aside. ( I used 1/4  measuring cup for molding the lollipops).


Step 8:Take a small bowl to add 1tbsp of cornflour with 3 tbsp of water mix and make it into watery consistency.

Step 9: Dip the fish lollipops into the cornflour mix &roll it on the bread crumbs and keep it in the refrigerator for 30 min. 


 Step 10:Heat a pan with enough oil for deep frying. Once the oil is hot add the fish lollypop and deep fry until it turns golden brown color. (cook in a medium flame.)


Serve the yummy crispy Fish lollypop is ready to serve.


          Try it in your kitchen!!! and enjoy with your loved ones !!!

  ===>   If you like my recipes. For more latest updates -->  Click Subscribe button and verify it through your email. 

===>Say-Hi in my social media accounts ==>Follow me on InstagramPinterest Twitter Facebook. 

        Try it in your kitchen!  If u like this recipe, do share it with your friends and family. Tried this recipe?? Tag me @myclickandtick and #myclickandtick on Instagram. 
           
                       Thanks for visiting my blog !! Welcome Again!!!


5.


4

Author

authorWelcome to my Blog !!! I am Bhuvana Devi ,Blogger behind My Click and Tick.
More


Try Me !!!